Why Flour Ignores Your Kitchen Timer
When wheat flour meets water, two proteins—gliadin and glutenin—hydrate and link together into elastic networks capable of trapping carbon dioxide produced by yeast. At the same time, protease and amylase enzymes naturally present in the grain begin snipping starch chains into simple sugars and slowly relaxing tight protein bonds.
Both biological processes speed up dramatically with warmth. A dough resting at 26°C (79°F) ferments nearly twice as fast as the exact same recipe sitting on a 19°C (66°F) granite worktop. If you follow a fixed four-hour timetable in a warm room, your dough will exhaust its structural strength before it ever reaches the oven. If you follow that same four-hour instruction in a chilly winter kitchen, you will bake a tight, gummy brick with a pale crust because enzymes haven't freed enough sugars to caramelize.
Stage One: Autolyse and Initial Hydration
When you first stir flour and water together, the mixture looks shaggy, sticky, and uneven. Resist the urge to dump extra flour onto the worktop. Give the covered bowl 30 to 45 minutes of quiet rest—a step formalized by French bread scientist Raymond Calvel as the autolyse. During this pause, water penetrates the dry starch granules and gluten aligns passively.
When you return to the bowl after half an hour, pinch a corner of the dough and pull upward. What felt tearing and pastelike thirty minutes ago now stretches several inches without snapping. That effortless extensibility means you only need three or four gentle sets of stretch-and-folds rather than fifteen minutes of exhausting bench kneading.
Stage Two: Reading Bulk Fermentation
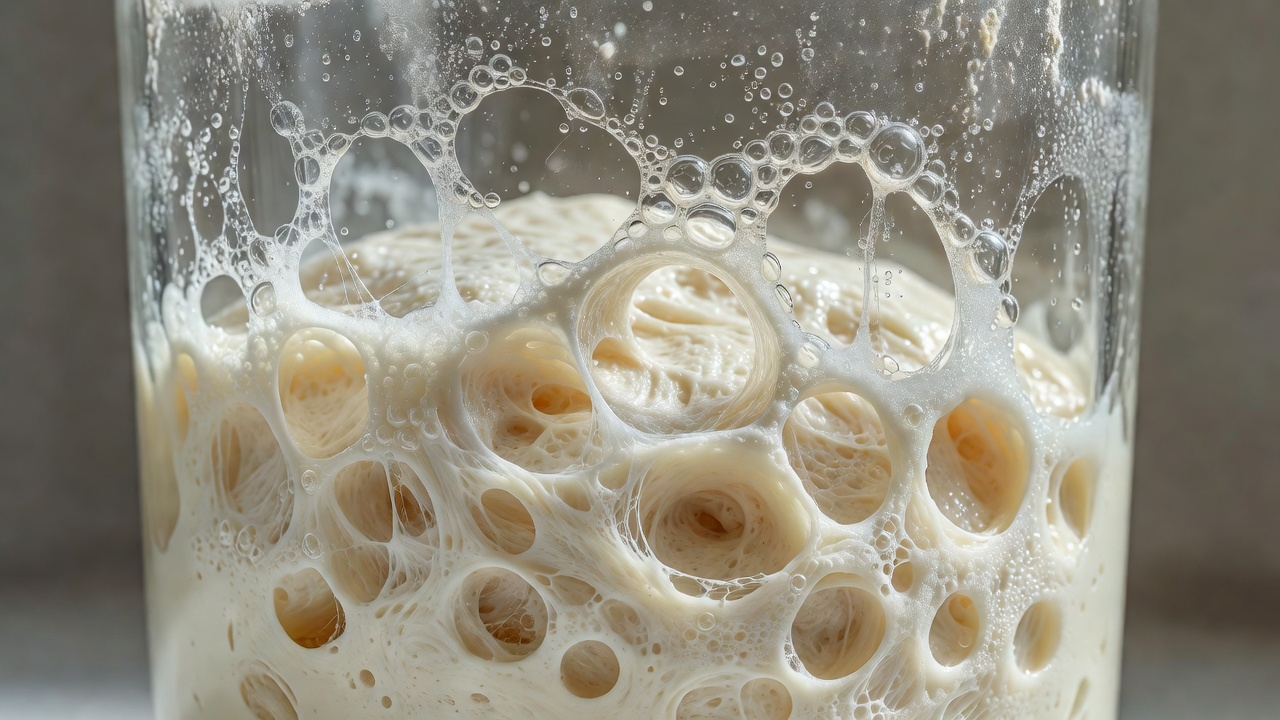
Bulk fermentation—the primary rise when the whole batch ferments together—is where flavour and crumb structure are born. Instead of using a curved ceramic bowl that hides volume changes, transfer a small sample of dough into a narrow, straight-sided jam jar or use a translucent cambro tub marked with a strip of masking tape.
| Fermentation Phase | Surface Appearance | Hand Feel & Aroma | Action to Take |
|---|---|---|---|
| Early Bulk (0–25% rise) | Flat top, slightly matte or uneven skin; zero visible bubbles on sides. | Dense, cool, resists stretching; smells purely of wet wheat flour. | Perform coil folds or stretch-and-folds every 30–40 minutes to build strength. |
| Mid Bulk (30–50% rise) | Smooth satin sheen; edges start curving slightly where dough meets the tub wall. | Elastic and bouncy; holds a ball shape after folding; faint sweet-milky scent. | Stop folding so you don't degas delicate air pockets; let rest undisturbed. |
| Sweet Spot (60–75% rise) | Pronounced domed top; scattered translucent blisters; pulls cleanly away from bowl sides. | Jiggles like set jelly when shaken; feels aerated, warm, and pillowy; yogurty wheat aroma. | Turn out gently onto a lightly floured surface for pre-shaping immediately. |
| Over-Fermented (100%+ rise) | Dome collapses flat or sinks in the middle; frothy foam bubbles breaking at surface. | Slack, sticky, tears when lifted; strong sharp vinegar or alcohol smell. | Do not bake free-form; oil a roasting tin, dimple with olive oil, and bake as focaccia. |
Stage Three: The Finger Poke Test for Final Proofing
Once shaped into a round boule, an oval batard, or tucked into a greased loaf tin, the dough undergoes its final proof. How do you know when to slide it into the oven? Flour your index finger and press gently about 1 centimetre (half an inch) into the side of the loaf.
Under-proofed: The indentation springs back immediately and completely, and the dough feels tight and muscular. Give it another 20 to 40 minutes at room temperature. Baking now will cause the loaf to burst wildly along the weak bottom seam.
Properly proofed: The indentation springs back slowly halfway, leaving a shallow, soft dimple behind. The remaining elasticity will expand cleanly when hit by oven heat.
Over-proofed: The indentation does not spring back at all, and the surrounding dough feels fragile. Score gently with minimal pressure (or skip scoring) and get it into the hot oven right away.
"Never throw out an over-proofed dough. Pour two tablespoons of olive oil into a cast-iron skillet, tip the slack dough straight in, dimple it with flaky sea salt and rosemary needles, and bake at 220°C. Mistakes still make magnificent supper bread." — Clara Vance, Head Baker at Baskewonhappyrumbl
Foundation Recipe: Same-Day Olive Oil & Rosemary Focaccia
If you want to practice reading dough elasticity and gas development without worrying about tight shaping or Dutch oven transfers, start with this high-hydration tray bake. Because the pan supports the sides, you can push fermentation to a dramatic, bubbly 85% rise.
- 500g strong white bread flour (12.5% protein)
- 400g lukewarm water (28°C / 82°F) — 80% hydration
- 10g fine sea salt
- 4g instant dried yeast (about 1¼ teaspoons)
- 45g extra-virgin olive oil (divided between bowl, pan, and top)
- Toppings: 2 sprigs fresh rosemary, 1 bulb roasted garlic cloves, flaky Maldon sea salt
Method by Dough Cues: Whisk water, yeast, and 15g olive oil in a wide bowl, then mix in the flour and salt until no dry patches remain. Cover and rest 30 minutes. With wet hands, scoop under the north side of the dough, stretch upward until you feel gentle resistance, and fold over itself; repeat on south, east, and west sides. Perform two more fold sets 30 minutes apart—notice how the dough transforms from slack batter into a cohesive, glossy pillow.
Coat a 23x33cm metal baking pan with 15g olive oil, transfer the dough inside, and let it relax for 60 to 90 minutes until it spreads to the corners and quivers when nudged. Drizzle the remaining 15g oil over top, oil your fingers, and press straight down to the metal pan to create deep dimples. Tuck roasted garlic cloves and wet rosemary needles into the dimples, scatter flaky salt, and bake at 220°C (425°F) on the lower-middle rack for 22–25 minutes until the bottom crust is crisp and deep golden.
Next: Learn how oven steam and thermal mass transform your shaped dough →